> ## Documentation Index
> Fetch the complete documentation index at: https://help.emaillove.com/llms.txt
> Use this file to discover all available pages before exploring further.
# Export Figma emails to Klaviyo
> Connect your Klaviyo account and export email designs from Figma as Klaviyo templates with the Email Love plugin.
The Email Love Figma plugin lets you design emails in Figma and export them as production-ready HTML directly into your Klaviyo account. This guide walks you through the complete setup process.
## Prerequisites
Before you begin, make sure you have:
* An active Klaviyo account with admin access
* The Email Love Figma plugin installed
* At least one email designed in Figma using the plugin
There are two ways to connect Klaviyo to the Email Love Figma plugin. We recommend connecting with the **Connect with Klaviyo** button. It's the fastest and most secure option, with no API key to create or manage. If you manage multiple Klaviyo accounts or prefer to connect manually, you can still use a private API key.
The quickest way to connect. No API key required.
1. Open Figma and navigate to your email design
2. Select your email frame
3. Launch the Email Love Figma plugin
4. Click the blue **Export** button
5. From the dropdown menu, select **Klaviyo (HTML only)**
6. Click **Connect with Klaviyo**
7. You'll be redirected to log into your Klaviyo account
8. Sign in and authorize Email Love to connect
That's it. Once you authorize the connection, your Klaviyo account is linked and you're ready to export, with no keys to copy or paste.
Prefer to connect manually, or managing multiple Klaviyo accounts as a freelancer or agency? You can connect using a private API key instead.
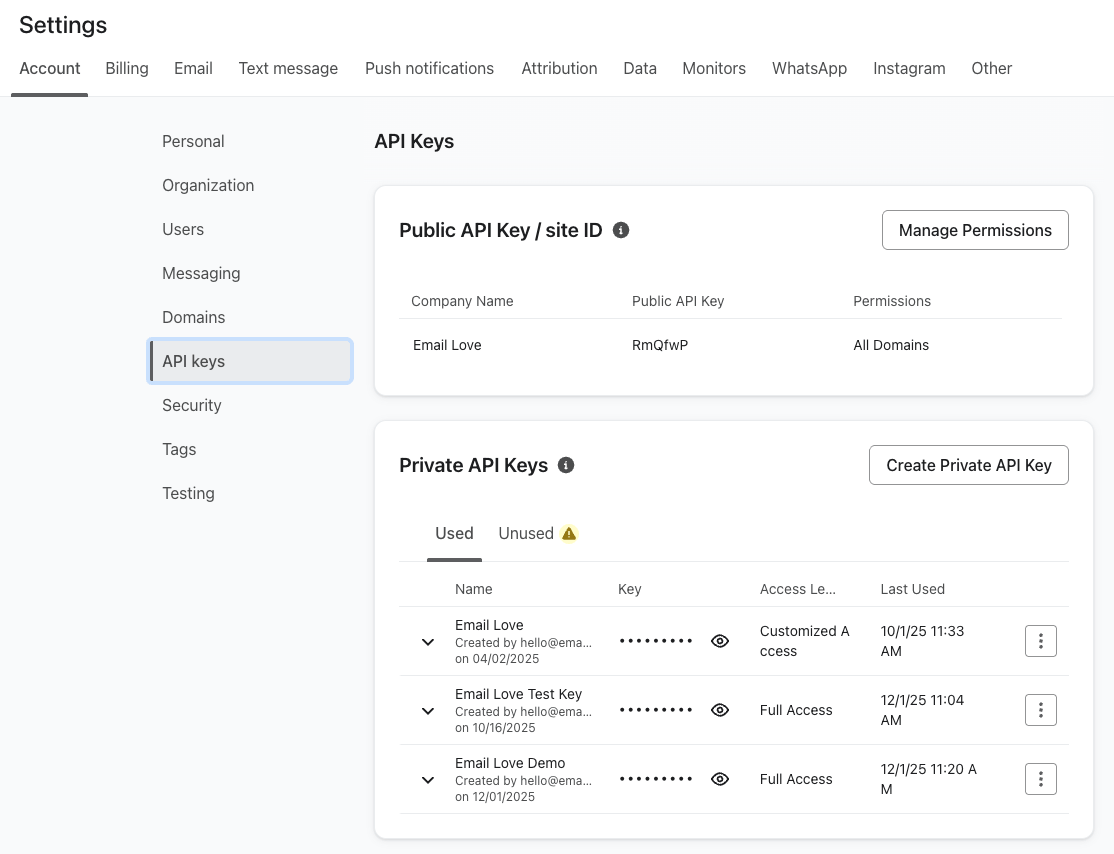
**Create a Klaviyo Private API Key**
1. Log into your Klaviyo account
2. Click on your account name in the bottom left corner
3. Click on the **Settings** cog icon
4. Navigate to the **API Keys** section
5. Click **Create Private Key**
6. Give your key a descriptive name (e.g., "Email Love Figma Plugin")
7. Grant the key **full access** to your Klaviyo account
8. Click **Create**
9. Copy the API key that appears (you'll need this in the next step)
**Pro tip:** If you're managing multiple Klaviyo accounts, use descriptive names for each API key to keep them organized.
**Add the API key to the plugin**
1. Launch the Email Love Figma plugin and select your email frame
2. Click the blue **Export** button
3. From the dropdown menu, select **Klaviyo (HTML only)**
4. Click **Change API Key**
5. Paste your Klaviyo API key in the top box
6. Give this connection a name (optional, but helpful if managing multiple accounts)
7. Click **Set API Key**
Your Klaviyo account is now connected to the plugin.
Once connected, exporting emails to Klaviyo takes just seconds.
1. With your email frame selected, click the blue **Export** button
2. Select **Klaviyo (HTML only)** from the dropdown
3. Click **Export**
4. Wait a few seconds for the upload to complete
5. You'll see a success message when the export is finished
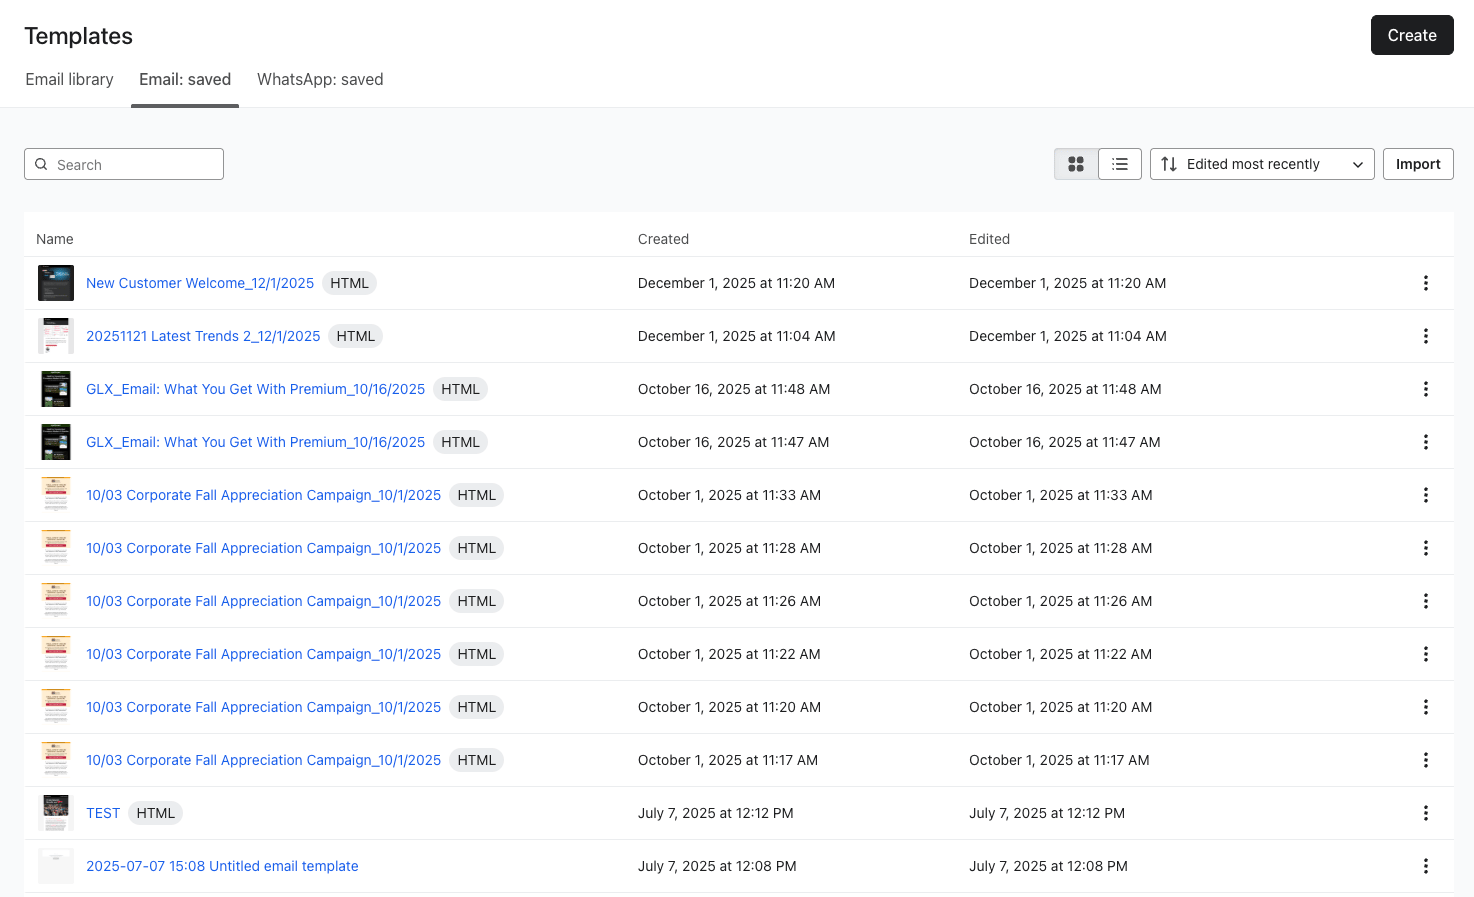
Your exported email will appear in the Klaviyo templates library.
1. Log into your Klaviyo account
2. Navigate to **Content** → **Templates**
3. Your newly exported template will appear at the top of the list
4. Click **Edit** to preview the HTML code
5. Click **Preview** to see how your email will render
You can now use this template in any Klaviyo campaign or flow.
## Using Your Template in Campaigns and Flows
To use your exported template:
**For Campaigns:**
1. Create a new campaign as usual
2. Select your audience
3. In the email content section, choose **Email Saved**
4. Select your exported template
5. Continue with your campaign setup
**For Flows:**
1. Navigate to your flow
2. Add or edit an email step
3. Choose your exported template from the saved templates
4. Configure your flow settings
## Working with Dynamic Content
If you're using Klaviyo's dynamic content features (like abandoned cart or browse abandonment emails), the Email Love plugin supports liquid templating for personalized product feeds.
**Setting Up Dynamic Product Templates**
You can wrap your content in liquid tags to pull in dynamic data from Klaviyo events:
1. Use the **Code component** at the top of your email to identify the event type
2. Customize the code based on your Klaviyo data feed structure
3. Add liquid tags to pull in product titles, prices, quantities, and images
4. Select image elements and add event image URLs in the properties tab
5. Link buttons to unique shopping cart URLs from your data feed
**Example liquid tags you can use:**
* `{{ event.product_title }}`
* `{{ event.product_price }}`
* `{{ event.product_image_url }}`
* `{{ event.product_quantity }}`
Dynamic tables will automatically loop through your data feed to display multiple products.
**Finding Dynamic Components**
Pre-built dynamic email components are available in the [**Ultimate Email Design System**](https://www.figma.com/community/file/1247396968159079452/the-ultimate-email-design-system). If you've duplicated that file, you'll find working examples of abandoned cart templates and other dynamic email patterns.
**Note:** Working with dynamic content requires familiarity with Klaviyo data feeds and liquid templating. If you're new to this, we recommend starting with static templates first.
## Preference Center Links
Klaviyo requires a way for subscribers to manage their email preferences, and the plugin now handles this for you automatically. On export to Klaviyo, any text in your design that reads **"preferences"** (for example, "Manage your preferences" in your footer) is automatically linked to Klaviyo's preference center, the same way unsubscribe text is linked to Klaviyo's unsubscribe URL.
To use it, just include the word "preferences" in your footer text. No manual merge tag needed. If you'd rather point the text somewhere custom, add your own URL to that text layer in the Properties tab and the plugin will respect it instead.
## Important Notes About Klaviyo Integration
**HTML Only Export:** The Email Love plugin only supports HTML exports to Klaviyo. We previously supported the Klaviyo drag-and-drop builder, but it frequently broke custom HTML code and caused issues with email rendering. Exporting as HTML ensures your emails render consistently across all email clients.
**Why HTML Works Better:** When you design in Figma and export as HTML, you maintain complete control over your email's appearance without the risk of the drag-and-drop editor modifying your code.
**Template Management:** Each time you export from Figma, a new template is created in Klaviyo. You may want to periodically clean up old versions from your templates library.
## Troubleshooting
**Export fails or times out:** Double-check that your API key has full access permissions. If you recently created the key, wait a minute and try again. Klaviyo sometimes takes a moment to activate new keys.
**Template appears blank in Klaviyo:** Make sure you selected the correct email frame before exporting. If you selected a nested layer instead of the top-level frame, the export may not include your full design.
**Images not loading:** The plugin automatically hosts your images during export. If images appear broken, check your internet connection and try re-exporting. See [Image Hosting](/plugin/images/hosting) for more details.
**Dynamic content not rendering:** Liquid tags only render when the email is sent through a Klaviyo campaign or flow with the appropriate event data. Use Klaviyo's preview tool with a test profile to verify your dynamic content.
## Related Articles
* [Export Overview](/plugin/export/overview): Understand all export options and how the plugin converts your Figma design to HTML
* [Image Hosting](/plugin/images/hosting): How the plugin handles image hosting during export
 **Add the API key to the plugin**
1. Launch the Email Love Figma plugin and select your email frame
2. Click the blue **Export** button
3. From the dropdown menu, select **Klaviyo (HTML only)**
4. Click **Change API Key**
5. Paste your Klaviyo API key in the top box
6. Give this connection a name (optional, but helpful if managing multiple accounts)
7. Click **Set API Key**
Your Klaviyo account is now connected to the plugin.
**Add the API key to the plugin**
1. Launch the Email Love Figma plugin and select your email frame
2. Click the blue **Export** button
3. From the dropdown menu, select **Klaviyo (HTML only)**
4. Click **Change API Key**
5. Paste your Klaviyo API key in the top box
6. Give this connection a name (optional, but helpful if managing multiple accounts)
7. Click **Set API Key**
Your Klaviyo account is now connected to the plugin.