> ## Documentation Index
> Fetch the complete documentation index at: https://help.emaillove.com/llms.txt
> Use this file to discover all available pages before exploring further.
# Embed a Countdown Timer into your email
> Add a live, animated countdown timer to your email template using Nifty Images and the Figma plugin
Create urgency and boost engagement by adding an animated countdown timer to your Email Love Figma template. This guide walks you through the entire process using [Nifty Images](https://niftyimages.com/) (or any countdown timer provider).
## What You'll Need
* Email Love Figma Plugin installed
* A Nifty Images account (or similar live content provider)
* Your email template in Figma
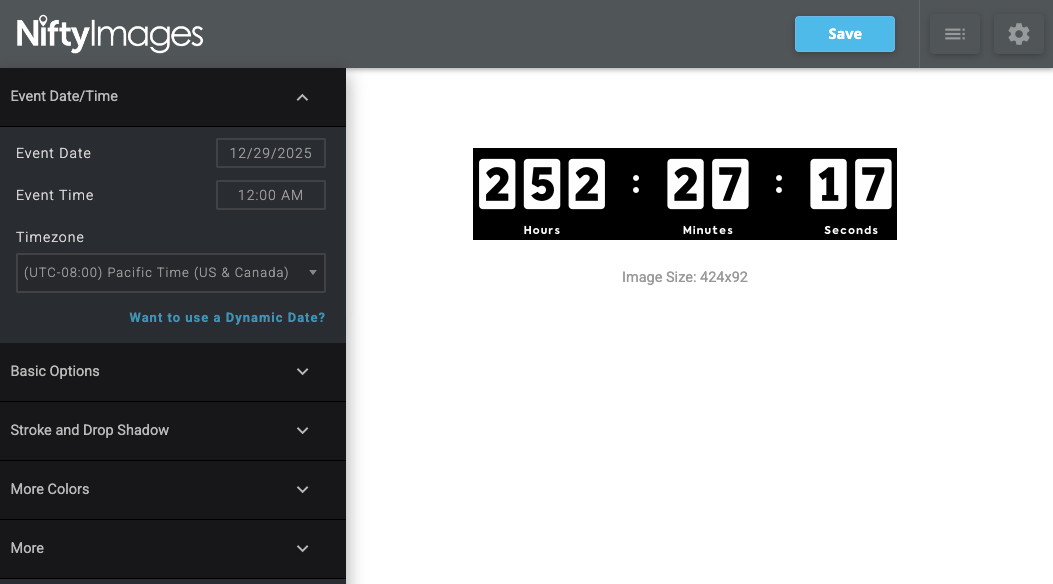
1. Log into your [Nifty Images](https://niftyimages.com/) account
2. Click the pink **Create Image Timer or Data Source** button
3. Select **Countdown Timer** from the options
4. Configure your timer settings:
* Set your event date and time
* Choose your preferred design
* Note the image dimensions (the default is 424px × 92px)
5. Save your countdown timer
6. Copy the **dynamic image URL**. You'll need this later.
Download a static version of the timer image to your desktop. You'll use this as a placeholder in Figma so you can see exactly how it will look in your design.
1. Open your email template in Figma
2. In the Email Love plugin, go to the **Image** section
3. Select the image component with padding (the second option with a white border). This gives you a wrapper with customizable spacing around your timer.
4. Replace the placeholder image with your static countdown timer image
1. Select the image and set it to **Fit** to see its actual dimensions
2. Adjust the container size as needed
3. Switch to **Fill** mode so the image fills the available space
4. Use the wrapper padding to control the timer's visual size. For example, 120px padding on each side works well for desktop.
### Mobile Optimization
The desktop padding will likely be too large on mobile devices. Here's how to fix that:
1. Select the wrapper element
2. Open **Mobile Styles** in the plugin
3. Enable **Mobile Specific Padding**
4. Reduce the side padding to around 30px for mobile
Match the countdown timer's background to your email design:
1. Select the wrapper or section containing the timer
2. Change the background color to match your design (in this example, black to match the hero section)
3. Adjust any spacing between sections as needed
This is what makes your timer actually count down in the inbox:
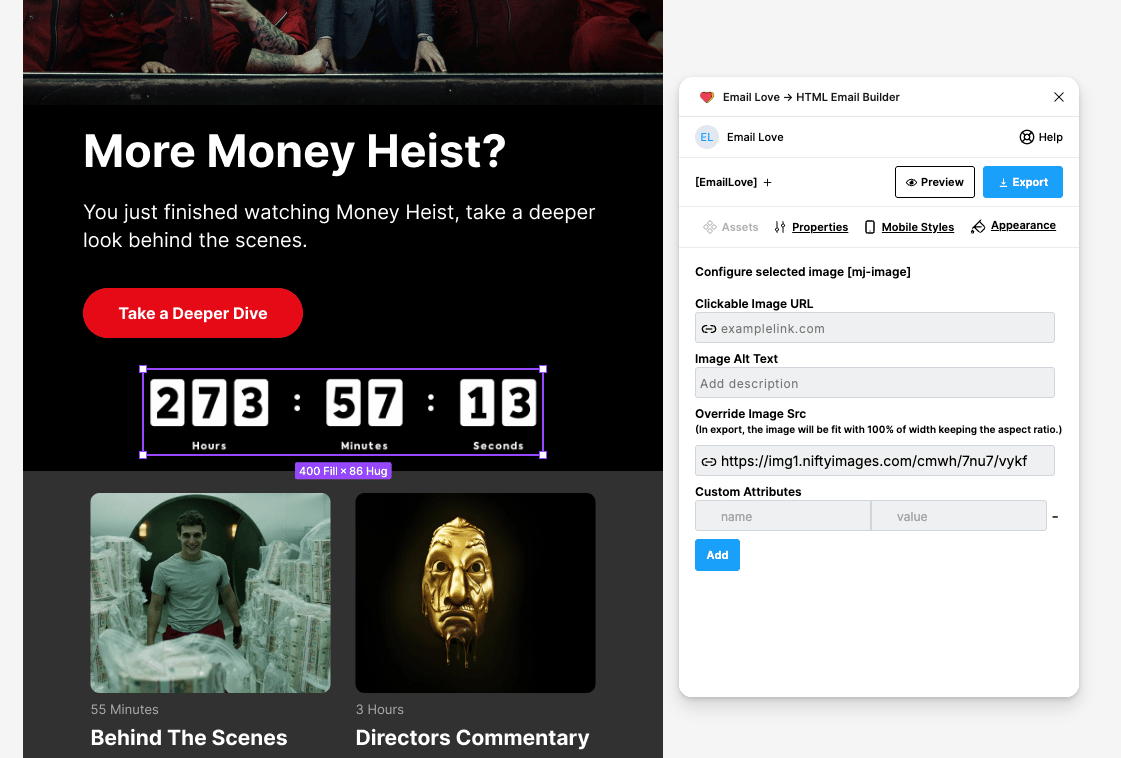
1. Select the image in Figma
2. Open the **Properties** tab in the Email Love plugin
3. Paste your dynamic URL from Nifty Images into the image source field
1. Click **Preview** in the plugin to verify the countdown is animating
2. Once confirmed, export your template as HTML or directly to your ESP
That's it! Your email now has a live countdown timer that will update in real-time when recipients open your email.
## Troubleshooting
**Timer not animating in preview?**
Double-check that you pasted the dynamic URL (not the static image URL) in the Properties tab.
**Timer looks too big or small on mobile?**
Adjust the mobile-specific padding in the wrapper settings.
**Timer background doesn't match your design?**
Some countdown timer providers let you customize the background color when creating the timer. Check your Nifty Images settings and consider setting the timer background to transparent so that it matches in dark mode.