> ## Documentation Index
> Fetch the complete documentation index at: https://help.emaillove.com/llms.txt
> Use this file to discover all available pages before exploring further.
# Designing an Email Template from Scratch
> Your own email designs, with help from our prebuilt components!
The Email Love Figma plugin is ideal for quickly designing email templates from scratch. In this tutorial, we'll show you how to design an email template using prebuilt components from our design library to create your first email campaign.
## Prerequisites
Before you can use the Email Love plugin, you need to install it first (for more information, see [Installing the Email Love Figma Plugin](/plugin/getting-started/install)).
When installing the plugin, you will have the option to try it for free or subscribe to a paid plan. For more information, see [Email Love Subscription Plans](/plugin/account/plans).
Once you have installed the plugin, you can start using it to create your own email designs.
1. Log on to Figma, then create a new design file.
2. On the next page, Page 1 of your new design file is highlighted on the navigation panel to the left side.
## Running the Plugin
You will now need to load the plugin so that you can use it to design your email template.
To run the plugin:
1. Click the **Actions** menu on the Toolbar at the bottom of the Figma canvas.
2. Under the **Plugins & Widgets** tab, select **Email Love - HTML Email Builder** to load the plugin.
## Creating Your First Frame
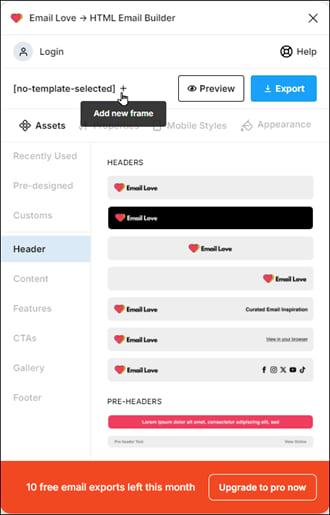
With the plugin ready for your use, create a new frame by clicking the **`[no-template-selected]+`** button on the upper left side of the Plugin interface.
 ## Design the Template Using Email Love's Pre-Built Components
You can now start designing your email template using Email Love's pre-built components.
Select the frame you created in the previous section.
On the Plugin interface, click on a header from the **Assets** library. On the canvas, the frame gets updated with the header you selected. For the next steps, the frame should remain selected.
Click **Features** under the **Assets** tab, then scroll down and select an H1 Headline component.
Click **Content**, then select an H2 Headline component from the list.
Click **Footer**, then select a footer from the list.
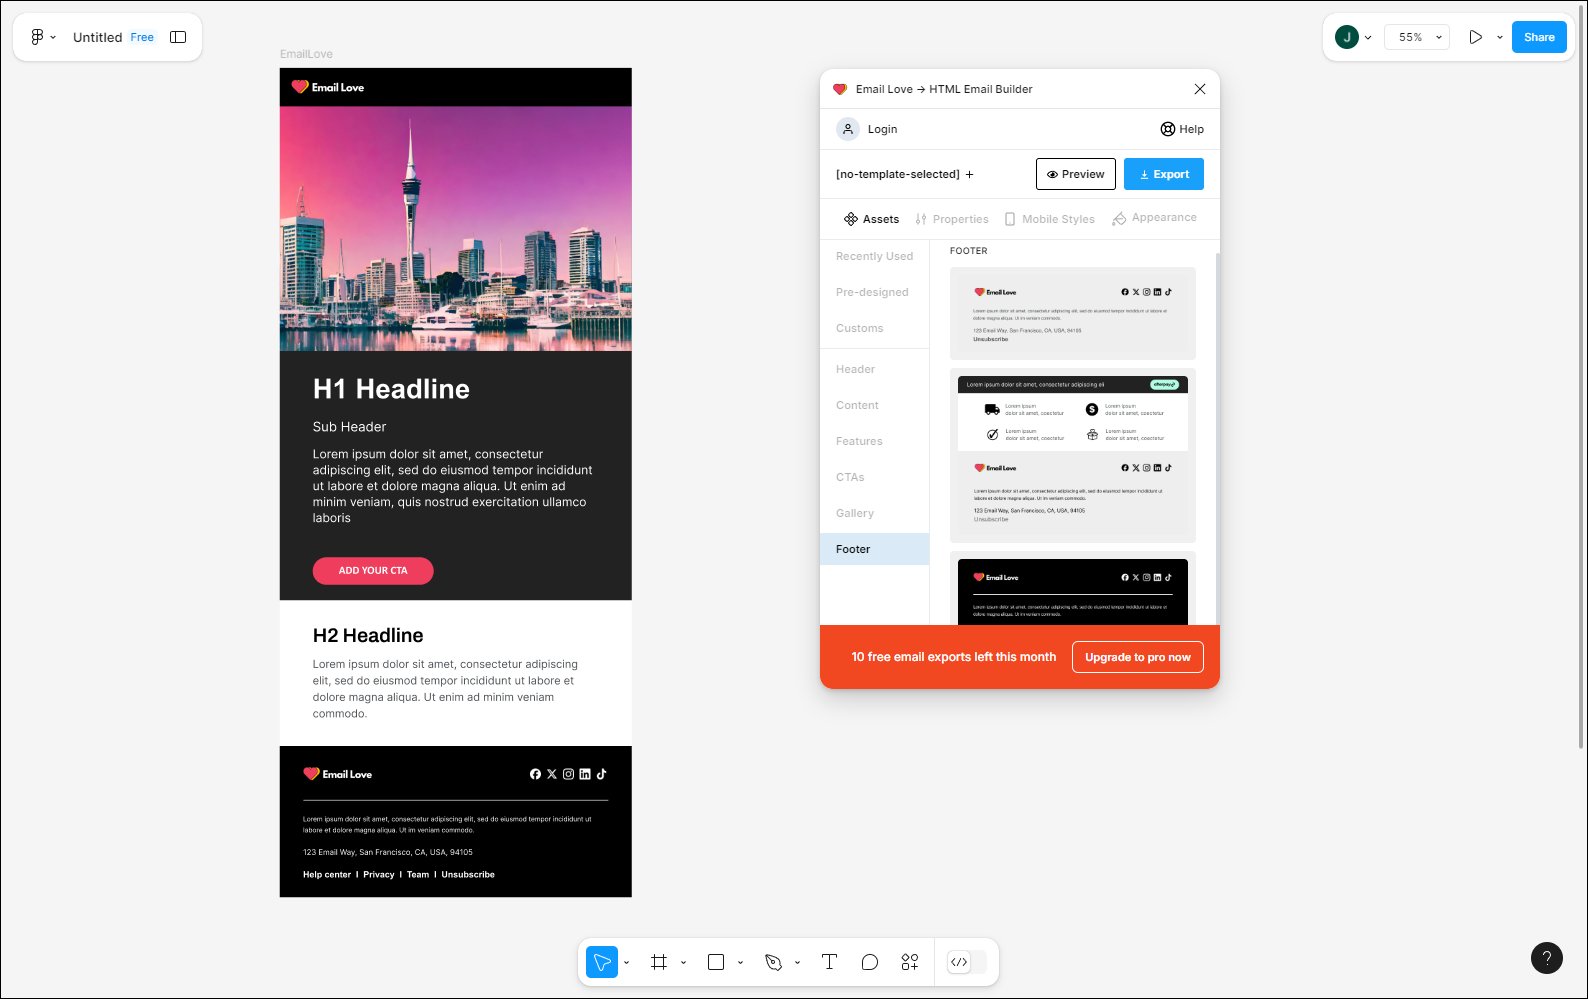
The screenshot below shows what we have created so far using Email Love's prebuilt components.
## Design the Template Using Email Love's Pre-Built Components
You can now start designing your email template using Email Love's pre-built components.
Select the frame you created in the previous section.
On the Plugin interface, click on a header from the **Assets** library. On the canvas, the frame gets updated with the header you selected. For the next steps, the frame should remain selected.
Click **Features** under the **Assets** tab, then scroll down and select an H1 Headline component.
Click **Content**, then select an H2 Headline component from the list.
Click **Footer**, then select a footer from the list.
The screenshot below shows what we have created so far using Email Love's prebuilt components.
 ## Customizing the Components
With our email design taking shape, it's now time to make the template truly your own. You can do this by customizing the components you have selected for your design.
Highlight the name on the top left, rename it from ***Email Love*** to ***My Own Template***, then press **Enter**.
Select the header, then double-click until you have the logo with the heart icon and named Email Love selected.
On the **Properties** panel in Figma, click **Image** under the **Fill** section, then replace the logo by uploading your own image from your PC.
Select the **H1 Headline** component, then double-click until you have the text, ***H1-Headline***, selected, then replace the text with ***Welcome***.
Replace the sub-header for the H1 headline with Hello there!, and the Lorem ipsum text at the bottom with your own.
Select the CTA button, double-click until you have the sample text selected, then replace the sample text with your own.
Edit the rest of the components using the same procedure outlined in the previous steps above.
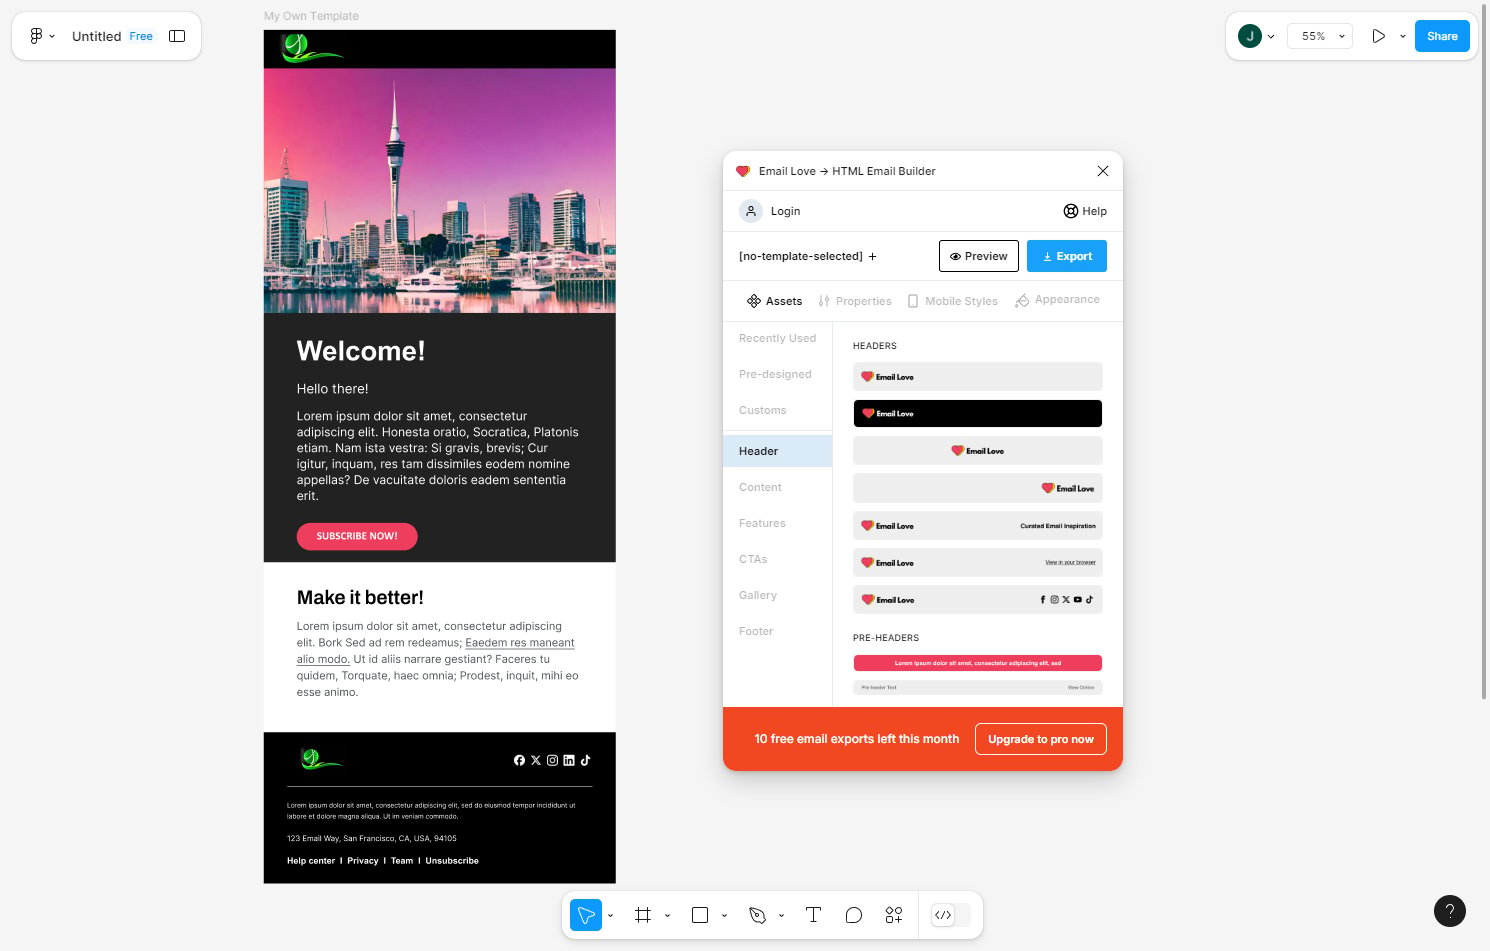
The screenshot below shows our template after customization.
## Customizing the Components
With our email design taking shape, it's now time to make the template truly your own. You can do this by customizing the components you have selected for your design.
Highlight the name on the top left, rename it from ***Email Love*** to ***My Own Template***, then press **Enter**.
Select the header, then double-click until you have the logo with the heart icon and named Email Love selected.
On the **Properties** panel in Figma, click **Image** under the **Fill** section, then replace the logo by uploading your own image from your PC.
Select the **H1 Headline** component, then double-click until you have the text, ***H1-Headline***, selected, then replace the text with ***Welcome***.
Replace the sub-header for the H1 headline with Hello there!, and the Lorem ipsum text at the bottom with your own.
Select the CTA button, double-click until you have the sample text selected, then replace the sample text with your own.
Edit the rest of the components using the same procedure outlined in the previous steps above.
The screenshot below shows our template after customization.
 To override image sources, render sections, images, or text as clickable, and add alt text to images, you can use the Properties tab in the Plugin interface. For more information, see [The Properties Tab](/plugin/email-properties/properties-tab).
## Summary
This tutorial guides you through the process of designing your own email template using the Email Love plugin. However, the features discussed here are just the tip of the iceberg. We encourage you to further explore the plugin to discover how it can streamline your email design process.
To override image sources, render sections, images, or text as clickable, and add alt text to images, you can use the Properties tab in the Plugin interface. For more information, see [The Properties Tab](/plugin/email-properties/properties-tab).
## Summary
This tutorial guides you through the process of designing your own email template using the Email Love plugin. However, the features discussed here are just the tip of the iceberg. We encourage you to further explore the plugin to discover how it can streamline your email design process.